



Do You Need a Deep Fryer?
Do you need a deep fryer to fry at home? Probably not. We wrote this guide to walk you through what actually works, what you can skip, and why the right pot matters more than any appliance.
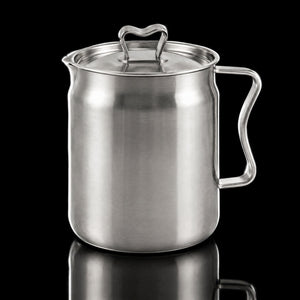
A deep, narrow pot does the same job as a countertop fryer. It holds a small well of oil, heats it to 350°F in minutes, and keeps splatter inside instead of across your stove. Japanese home cooks have fried this way in small apartments for decades. The setup is simple: a pot, a thermometer, and a rack to drain on. That is the whole list.
Here is everything you need to know about frying at home without a deep fryer.

Do You Need a Deep Fryer?
It is a fair question. Most of us watched someone fry once, spent the next hour wiping oil off the backsplash, and quietly decided that frying is a restaurant thing. I did exactly that. I kept my distance from hot oil for years because the mess felt built in.
But the mess was never about the frying. It was about the pot. A wide, open pan throws oil because there is nothing between the bubbling surface and your kitchen. Every pop lands somewhere you have to clean. A countertop deep fryer solves that, sure, but it takes up a cabinet shelf, it smells like old oil after three uses, and most of them are a pain to clean.
The middle option is a deep, narrow pot with a lid. The lid closes over the oil while it heats. Splatter stays contained. When the food comes out, the lid opens into a drain rack so the oil runs back into the pot instead of onto your counter. This is how home frying works in Japan, and it is the reason frying there never carried the same dread.
So no, you do not need a deep fryer. You need a pot that does three things: holds a small amount of oil deep enough to float your food, keeps the splatter inside, and gives you somewhere to drain. That is a shorter list than most people expect. I thought frying required a whole setup. Turns out it required one good pot and a thermometer.
Why Is a Deep Pot Better for Frying at Home?

Less oil, faster heat. A deep narrow pot needs about two to three cups of oil to reach frying depth. A wide Dutch oven or a countertop fryer can need a quart or more. Less oil heats up faster, costs less to replace, and cools down quicker when you are done. Two cups of canola oil costs roughly a dollar. You can strain it after you finish, store it in a jar, and use the same batch three or four more times before it needs replacing. That is a month of Friday fry nights for under five dollars in oil.
Contained splatter. The tall walls and the lid do most of the work here. When oil pops, it hits the inside of the pot, not your stove or your arm. This is the single biggest reason people avoid frying at home, and the simplest one to fix. I used to lay paper towels across my entire stovetop before heating oil. It looked ridiculous. With a deep pot and a lid, I stopped doing that on the first try. The splatter just stays inside.
Steady temperature. A narrow well of oil holds its heat better between batches. When you drop cold food into hot oil, the temperature dips. In a wide shallow pan, that dip is steep and slow to recover. The food sits in cooling oil, absorbs it, and comes out heavy and greasy instead of crisp. In a deep pot, the oil climbs back to 350°F fast because there is less surface area losing heat to the air. That recovery speed is the whole difference between food that crunches and food that sags.
Easy cleanup and storage. A single pot is easier to wash than a countertop appliance with a basket, a heating element, and a lid that all need scrubbing. The pot goes in the sink like any other dish. When you are done, strain the oil back into the pot or into a jar and put it away. No disassembly. No finding cabinet space for a bulky machine you use once a month.
How to Deep Fry at Home
Step 1: Gather your tools
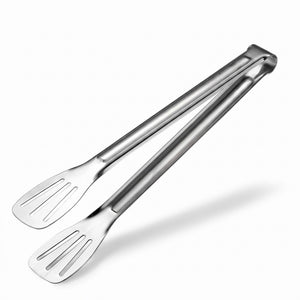
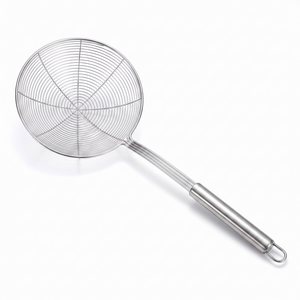
You need a deep pot, a clip on thermometer, a wire rack set over a sheet pan, and tongs or a spider strainer. A neutral oil with a high smoke point works best. Vegetable, canola, or peanut oil are all good picks.
Step 2: Heat your oil
Pour oil into the pot until it comes about halfway up the sides. Clip the thermometer to the rim before you turn the burner on. You want to see the temperature climb, not guess where it is. Most frying happens at 350°F to 375°F. Let the oil get there and hold for a minute before you start.
Step 3: Fry in small batches
Add food a few pieces at a time. Too much at once drops the oil temperature and gives you soggy results. Let each batch cook without moving it for the first thirty seconds, then flip or turn gently. Most items take two to five minutes depending on size.
Step 4: Drain and hold

Lift the food out with tongs or a spider and set it on the wire rack. Do not use paper towels on the holding tray. They trap steam under the food and turn your crispy crust soft. The rack lets air flow on all sides. If you are frying more than one round, keep finished batches warm in the oven at 200°F.
After everything is done, let the oil cool all the way down. Strain it through a fine mesh sieve into a jar or back into the pot. Stored in a cool spot, it is good for two or three more uses.

Tips for Success
Watch the thermometer, not the clock
Timing is a rough guide. Temperature is the real one. If the oil is too cool, food absorbs it and turns greasy. If it is too hot, the outside burns before the inside cooks through. Keep the thermometer clipped on the rim where you can see it and glance at it between batches. Adjust the burner up or down as you go. Every stove runs a little different, and the temperature drops every time food goes in. Most recipes say "fry for four minutes" but your thermometer will tell you more than any timer. When the oil holds steady and the food floats golden, it is done.
Fry in the right order
Start with dry breaded items like tenders and katsu while the oil is still clean. Move to battered items like tempura and pickles next. Save dessert for last. Wet batter drops crumbs into the oil faster, and a little savory flavor in the oil actually helps sweet items at the end.
Remember the rule: lid down to fry, lid up to drain
That is the whole system in one line. Close the lid while the oil heats and between batches to keep splatter inside. Open it when the food comes out so it drains back into the pot instead of pooling on your counter. One move, two jobs. I say this to myself every time I fry now. It is the only thing I needed to learn to stop being afraid of the oil.
Ready to Fry?
Frying at home asks a little more attention than roasting does, but almost none of what it asks is hard. It is mostly having the right pot and leaving the oil alone. If you do not have one yet, this is a good reason to fix that: the Karuya fry pot closes over the oil while it heats, opens into a drain rack so the oil runs back where it came from, and comes with a thermometer already clipped on. Then go make the crispy fried chicken. It is a great first fry.
Happy frying.
Lena
You might also like:


