



Crispy Fried Chicken at Home
Crispy fried chicken starts with a long soak in buttermilk and a thick coat of seasoned flour. Bone-in thighs, a hot pot of oil, and about twenty minutes of frying. That's it. The crust shatters when you bite in, and the meat stays juicy all the way to the bone. A solid family dinner any night of the week.
I put off making fried chicken at home for years. The recipes I found called for a giant pot of oil and a splatter guard, and the whole thing felt like a mess I'd regret. Then I started frying smaller batches in a deep, narrow pot with a lid on, the way Japanese home cooks do it. Less oil, less splatter, faster cleanup. Now it shows up on our table most Fridays, and my family picks the bones clean every time.
The funny thing is, the chicken got better once I stopped trying so hard. I used to double-dip in egg wash, add cornstarch, do all these extra steps. The version I make now is just buttermilk and flour. Simpler and crunchier. Go figure.
This fried chicken is:
- Crunchy on the outside, juicy at the bone
- Seasoned all the way through from the brine
- Good at room temperature (picnic-ready)
- Easy enough for a weeknight
- Big enough for a crowd if you double it
- Even better the next day, cold from the fridge
Ingredients You'll Need

Bone-in, skin-on chicken thighs are the best cut for frying. The bone keeps the meat moist during the long cook, and the skin crisps up under the flour. You can use drumsticks too. Breasts dry out fast at frying temps, so if you go that route, cut them in half crosswise.
Buttermilk breaks down the surface of the chicken and makes the flour stick. Pour enough to cover the pieces in a bowl or zip bag. Four hours is the minimum. Overnight is better. If you don't have buttermilk, stir a tablespoon of white vinegar into a cup of regular milk and let it sit for ten minutes.
All-purpose flour is the base of the dredge. No need for cake flour or rice flour here. Plain white flour gives you that thick, craggy crust that holds up.
Salt, black pepper, garlic powder, paprika, and a pinch of cayenne go into the flour. Season it heavier than you think. The flour is the only seasoning layer between the buttermilk and the oil. I taste a pinch of the dry mix before I start dredging. If it tastes bland on its own, it'll taste bland on the chicken.
Neutral oil with a high smoke point. Vegetable, canola, or peanut. You need enough to come about halfway up the pot. For a small fry pot, that's roughly two to three cups.
Overview: How to Make Crispy Fried Chicken

1. Brine the chicken in buttermilk. Place the thighs in a large bowl and pour buttermilk over them until every piece is covered. Press them down if they float. Cover the bowl and put it in the fridge for at least four hours. Overnight works best.
2. Mix the seasoned flour. In a wide, shallow dish, combine two cups of all-purpose flour with a teaspoon each of salt, black pepper, garlic powder, and paprika. Add half a teaspoon of cayenne if you want a little heat. Stir it all together with a fork.
3. Dredge the chicken. Pull each piece out of the buttermilk and let the extra drip off for a second. Press it into the flour on both sides. Push the flour into every fold and crease. Shake off the loose stuff. Set the coated pieces on a wire rack and let them sit for ten minutes. This rest lets the coating set so it won't slide off in the oil.

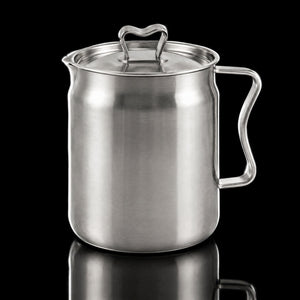
4. Heat the oil to 325°F. Pour oil into the Karuya fry pot until it comes about halfway up the sides. Clip the thermometer to the rim before you turn on the burner. Let the oil come up to 325°F and hold it there. Bone-in chicken needs a lower temp than tenders or wings so the inside cooks through before the crust gets too dark.

5. Fry in batches. Lower two or three pieces into the oil, skin side down. Don't crowd the pot. Too many pieces at once drops the oil temp and gives you soggy chicken. Fry for about eight to ten minutes per side, adjusting the heat to keep the oil around 325°F. The chicken is done when a meat thermometer reads 165°F at the thickest part near the bone.
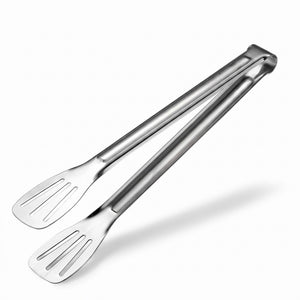
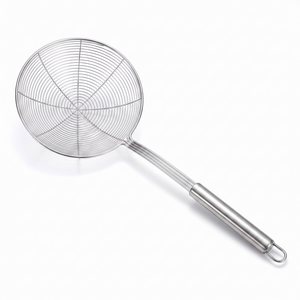
6. Drain on a wire rack. Lift each piece out with tongs or a spider and set it on a wire rack over a sheet pan. Skip paper towels. They trap steam and soften the crust. The rack lets air hit every side so the coating stays crunchy. Sprinkle a little flaky salt on top right away.

7. Hold and serve. If you're frying more than one batch, keep the finished pieces warm in the oven at 200°F on that same rack. Let every piece rest for at least five minutes before you eat it. The crust actually gets crunchier as it cools a little.
Common Questions
Can I use chicken breasts instead of thighs?
You can, but they cook differently. Breasts are thicker and leaner, so they dry out faster at frying temperatures. If you go with breasts, cut each one in half crosswise so the pieces are closer in size to a thigh. That helps them cook through without burning the outside. Check the internal temp early. They'll hit 165°F faster than bone-in thighs.
Why is my fried chicken greasy?
Two common reasons. First, the oil wasn't hot enough when the chicken went in. Cold oil soaks into the breading instead of cooking it. Use a thermometer and wait for 325°F before you start. Second, the chicken sat on paper towels instead of a wire rack. Towels hold the oil against the crust. A rack lets it drip off and keeps air moving around the food.
Can I make fried chicken in an air fryer?
You'll get a different result. An air fryer gives you crispy skin, but the crust won't have that thick, craggy texture you get from a flour dredge and hot oil. The buttermilk-and-flour method here is built for oil frying. If you want to try it in an air fryer, spray the coated pieces with oil and cook at 380°F for about twenty minutes, flipping halfway. It works, but it's a different dish.
Do you need a deep fryer for this?
No. A deep, narrow pot on the stove works better for most home cooks. It uses less oil, heats up faster, and stores easier than a countertop appliance. We wrote a whole post about it: do you need a deep fryer?
Serve It Up

This chicken goes with just about anything. Cole slaw, corn on the cob, biscuits, or a simple green salad. Mac and cheese if you want to go all in. For Friday night dinner ideas that pair well, it sits right next to fried pickles and honey butter tenders.
Store leftovers in the fridge for up to three days. Reheat on a wire rack in the oven at 375°F for about ten minutes. The crust comes back crispy. The microwave works in a pinch, but the coating goes soft.

If you don't have a good frying setup yet, the Karuya fry pot closes over the oil while it heats, opens into a drain rack when the food comes out, and comes with a thermometer already clipped to the rim.
If you try this recipe, leave a comment and let me know how it turned out. Rate it below if it made your Friday night. Tag us on social so I can see your chicken.


